
①ubidotsの準備
1.ubidotsに登録し、ログインします。
2.「Source」をクリックし、「Add Data Sources」をクリックします。
3.Data Sources(データソース)の名前を変更します(([Enter]キーで確定))。
6.データの種類(Type)を選択(ここでは、「Default」を選択)します。
7.Variableの名前を入力します([Enter]キーで確定)。
8.作成されたVariableのパネルの右上の(i)アイコンをクリックし、Variable IDを確認します。
9.右上のユーザー名をクリックし、「My Profile」を選択します。
10.「API Key」をクリックし、API Keyを確認します。
②Arduinoのセットアップと回路の配線
1. 「ArduinoをJavaScriptで制御する」の手順でセットアップします。
③ubidotsライブラリ(Node.jsのモジュール)のインストール
1.コマンドププロンプトを起動し、作業用フォルダに移動します。
2.「npm install ubidots」と入力します。
④プログラムの作成
次のJavaScriptコードを入力し、「Temperature.js」と名前を付けて作業用のフォルダに保存します。
This file contains hidden or bidirectional Unicode text that may be interpreted or compiled differently than what appears below. To review, open the file in an editor that reveals hidden Unicode characters.
Learn more about bidirectional Unicode characters
var five = require("johnny-five"); | |
five.Board().on("ready", function() { | |
var temperature = new five.Thermometer({ | |
controller: "LM35", | |
pin: "A0", | |
freq: 60000 // サンプリング間隔(ms) | |
}); | |
var ubidots = require('ubidots'); | |
var client = ubidots.createClient('<Your API Key>'); | |
client.auth(function () { | |
this.getDatasources(function (err, data) { | |
console.log(data.results); | |
}); | |
// データ保存先のVariableを取得 | |
var v = this.getVariable('<Variable ID>'); | |
temperature.on("data", function() { | |
v.saveValue(this.celsius); // Variableにデータを保存 | |
console.log(this.celsius + "°C", this.fahrenheit + "°F"); | |
}); | |
}); | |
}); |
⑤動作の確認
1.コマンドププロンプトを起動し、作業用フォルダに移動します。
2.「node Temperature.js」と入力します。
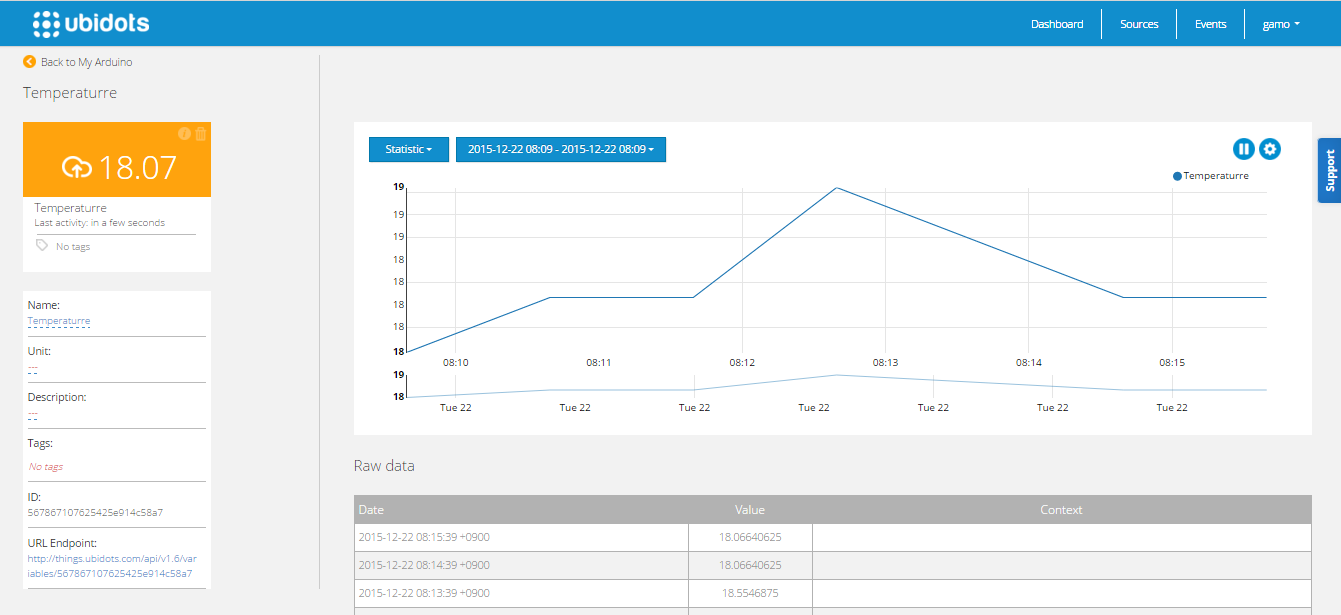
3.ubidotsの管理画面で「Temperature」Variableを開きます。
0 件のコメント:
コメントを投稿